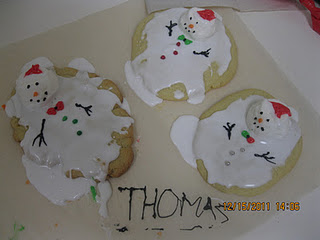
Rudolph the Red-Nosed Reindeer Cupcakes
For the chocolate glaze:
- 1 1/2 cups powdered sugar
- 3 tbsp unsweetened cocoa powder
- 3 tbsp fat-free milk
- 1/2 tsp vanilla extract
- pinch of salt
For the vanilla glaze:
- 1/2 cup powdered sugar
- 1/8 tsp clear vanilla extract
- 1 - 2 tsp fat free milk
For the face:
- 24 low fat small vanilla wafers
- 72 m&m's, 24 red, 48 brown
- 12 pretzels, broken in half to create ears
Directions
Preheat oven to 350°. Line cupcake tins with liners.
Combine all the cake ingredients in a large mixing bowl and beat until combined. Pour into prepared liners. Bake about 25 minutes, or until a toothpick inserted comes out clean. Allow to cool before frosting.
Make the chocolate glaze: whisk all the ingredients in a medium bowl. Keep the chocolate glaze in the bowl.
Make the vanilla glaze by whisking all the vanilla glaze ingredients in another bowl. Place vanilla glaze in a piping bag.
To assemble the cupcakes, dip the tops of the cupcakes into the chocolate glaze and quickly press the vanilla wafer onto the bottom of each cupcake. The chocolate glaze will dry fast so you want to make a few at a time. Let the glaze harden at least 5 to 10 minutes.
Using the vanilla glaze, pipe 2 circles for the eyes and press the chocolate m&m's into the glaze. Pipe the vanilla glaze for the nose and press the red m&m onto the nose.
Then insert pretzel pieces for the ears and they are complete.
Original recipe retrieved from http://www.skinnytaste.com/2011/12/rudolph-red-velvet-cupcake.html .
Vanilla Cupcake:
- 1 1/3 cups sugar
- 1/2 cup butter, cut into 1-inch pieces
- 1 large egg
- 1 large egg yolk
- 1/3 cup milk
- 1/3 cup water
- 1 1/4 teaspoons pure vanilla extract
- 1 1/3 cups all-purpose flour
- 2/3 cups cake flour
- 2 teaspoons baking powder
- 1/4 teaspoon fine salt
Preheat oven to 350 degrees F. Line one 12-cup cupcake tin with paper liners. (To avoid cupcakes sticking if they overflow slightly, lightly spray the tops of the pans.) Put tins on a baking sheet. Set aside.
Process sugar and butter in a mixer until very creamy, scraping sides as needed, 1 to 2 minutes. Add the egg and yolk, one at a time, pulsing after each addition. Add the milk, water, and vanilla and process to blend.
Whisk both flours, baking powder, and salt in a medium bowl. Add the dry ingredients, in 3 batches to the wet, pulsing, and then scraping batter off the sides of the processor as needed after each addition. Process until the batter is very smooth and pourable like pancake batter, about 2 minutes.
Evenly pour the batter into the prepared cups, filling them 3/4 of the way full. Bake until the cakes are just firm and spring back when gently pressed, and the tops are golden, 18 to 25 minutes. Cool slightly in tin, and turn out of tin when cool enough to handle. Cool cupcakes completely on a rack before frosting.
Yield: 12 cupcakes
Prep Time: 20 minutes
Cook Time: 25 minutes
Inactive Prep Time: 30 minutes